Integrating Custom Email Servers with TrustAuthX 📧🔒
In the digital world, email servers are crucial for communication. TrustAuthX's Custom Email Server feature allows you to integrate any email server or provider with TrustAuthX, enhancing the flexibility and efficiency of your authentication process.
This feature enables developers to use their preferred email servers for sending authentication emails, such as verification links or one-time passwords (OTPs). This not only personalizes your authentication process but also ensures high security standards.
Steps to Integrate Custom Email Servers in TrustAuthX

Step 1: Navigate to the Organizations Tab 🗂️
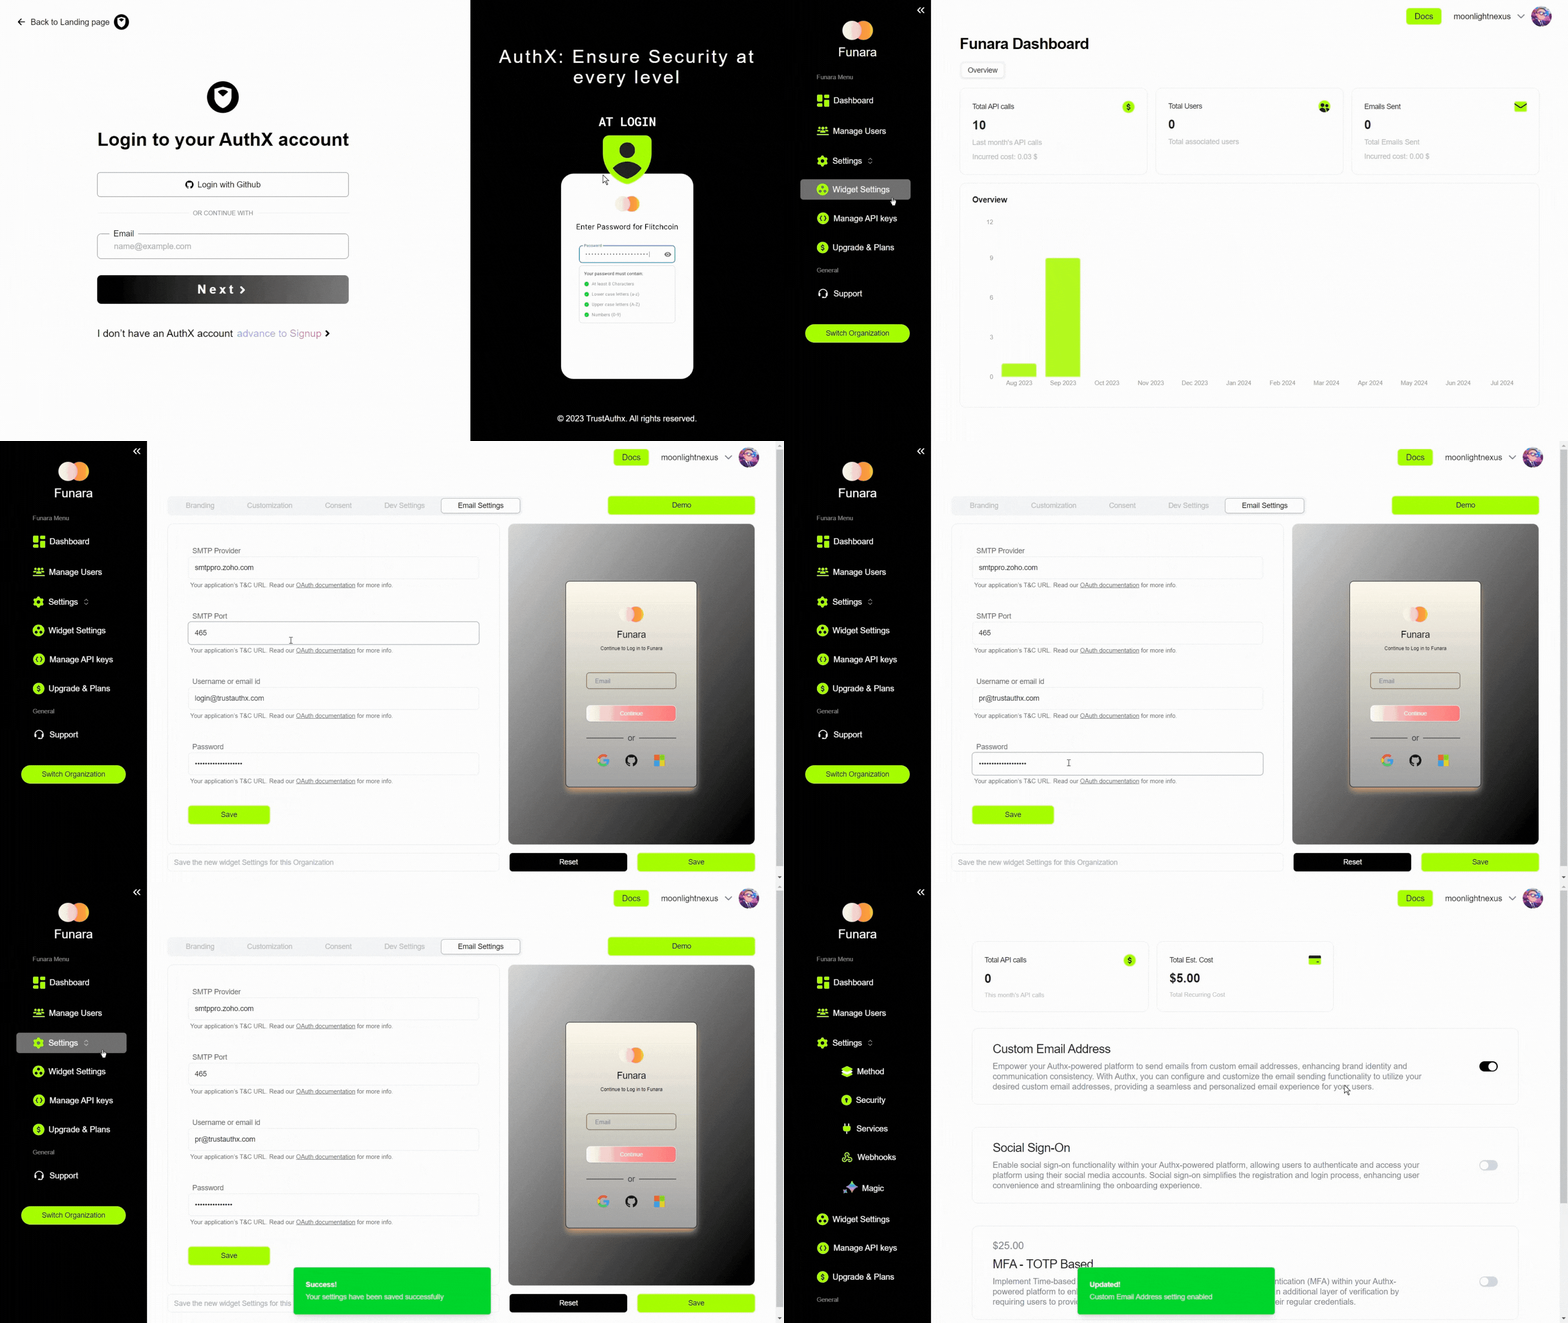
Start by signing up at TrustAuthX and creating a new organization. Then, click the "Manage" button in the Organization table for the required organization.
Step 2: Access the "Settings" and Select the "Widget Settings" Tab ⚙️
Next, select "Widget Settings" from the sidebar. Here, you'll see different tabs and customization options.
Step 3: Select the "Email Settings" Tab 📧
Next, select "Email Settings" from the Horizontal Top Bar.
Step 4: Fill in the Details 📝
Specific details are required for the proper functioning of email servers.
- SMTP Provider: Host address of the email server.
- SMTP Port: Port for TrustAuthX to access for sending Email. Specific ports are for specific purposes and TrustAuthX takes them in their default context.
- Username or Email ID: Username for authentication purpose. This is how TrustAuthX will access the emailing account.
- Password: Respective password for the account.
Step 5: Confirm Your Selection ✅
Finally, click "Save" to confirm. This will save server Settings to your organization.
Step 6: Now, Access the "Settings" and Select the "Methods" Tab ⚙️
Next, select "Settings" from the sidebar and then choose the "Methods" tab. Here, you'll see the different authentication methods and their features.
Step 7: Enable "Custom Email Server" 🔐
Click the toggle button in the "Custom Email Server" section. A popup will appear, informing you that this feature can be turned on at any time, but can only be turned off 14 days after activation.
Step 8: Confirm Your Selection ✅
Finally, click "Yes" to confirm. This will add the custom emailing server to your authentication flow and all resources will be allocated to your organization. This feature is absolutely free!
This document provides a step-by-step guide on how to integrate Custom Email Servers with TrustAuthX, along with an overview of the supported email servers. 🌐💻